
How-to use TrueRNGpro with Python in Windows 10 and Linux
Installing the TrueRNG & Driver
First – follow the instructions for installing the driver for the TrueRNG.
On Windows, you download and install the .inf file then plug in the device. You should see it come up in the device manager
as a ‘Port’ (Window-x on the keyboard, then click Device Manager in Windows 10)

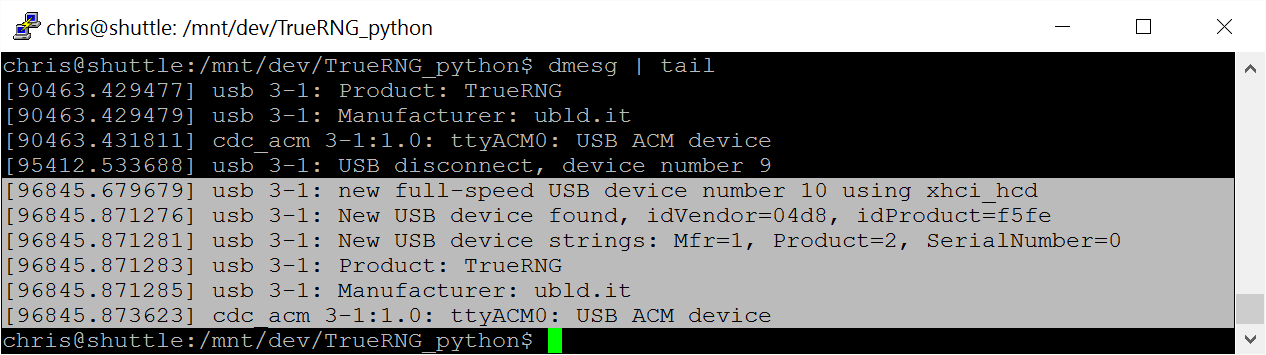
On Linux, you should see the device in your dmesg (i.e. “dmesg | tail”). Installing the udev rule per the instructions
will make it show up also as /dev/TrueRNG.
Note: on Linux, to access the TrueRNG as a user, you may need to modify the device node permissions to allow users to access the
hardware directly. You can use the below command for this.
sudo chmod 666 /dev/TrueRNGor change to whatever device node that your system assigns to the device like:
sudo chmod 666 /dev/ttyACM0Installing Python 2.7 and pyserial on Windows 10
On Windows, you go to the Python website and download the “Windows x86-64 MSI installer” or
“Windows x86 MSI installer” for the latest version of Python 2.7 (currenly it is 2.7.12). Run the install program and install it
with all of the default options. This should install Python in c:\python\python2.7 or c:\python2.7
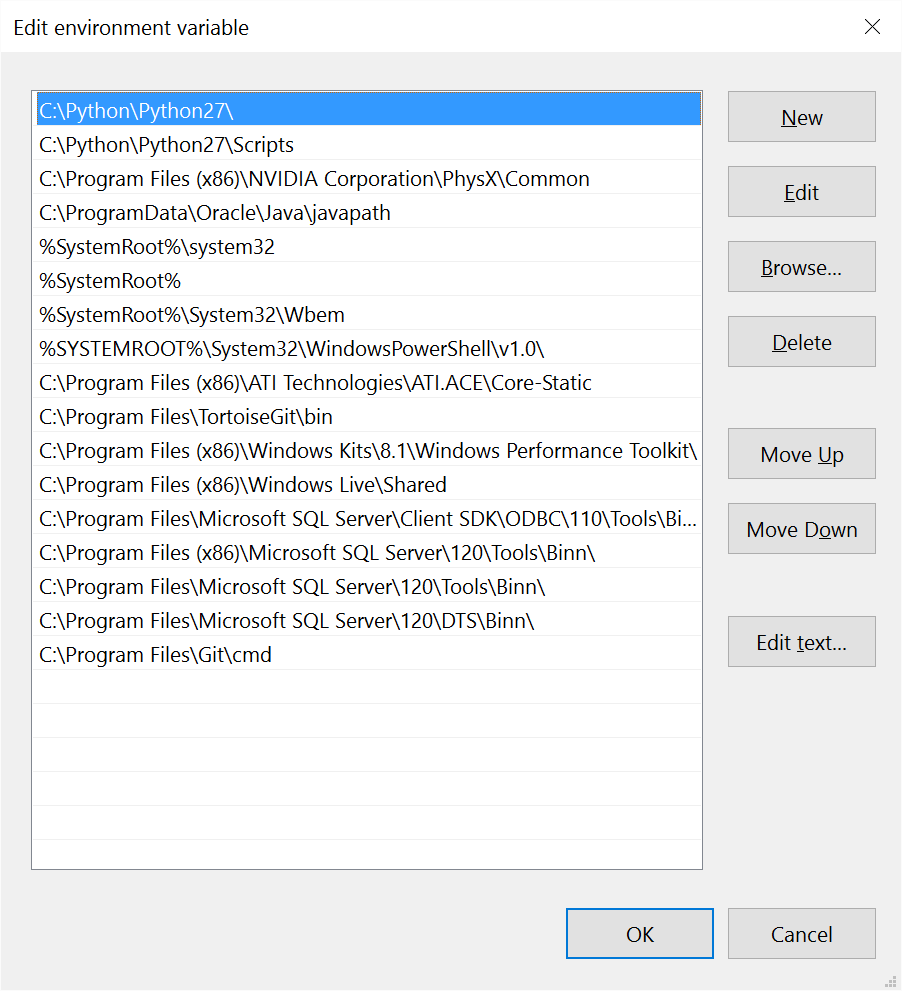
Next, we need to add the Python directories to the path. To get there in Windows 10, you use Window-x, click “system”,
click “Advanced system settings”, then click “Environement Variables”. Choose the “Path” variable and click edit. You should add
your Python27 and Python27\Scripts directories here according to the install directory you chose.
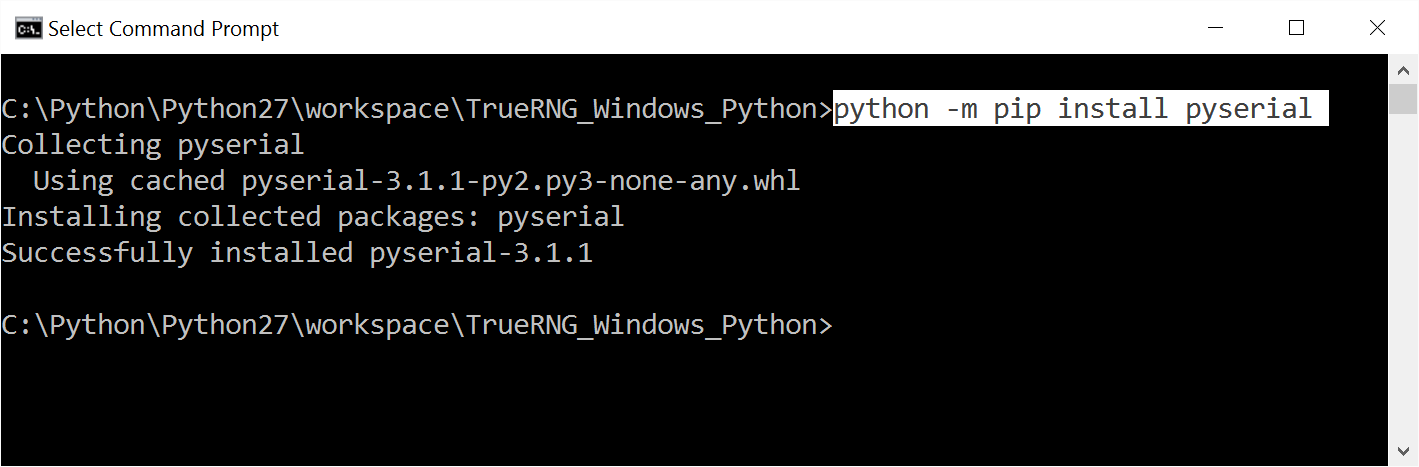
To install pyserial (Python serial port library), open up a Command Prompt window and use “python -m pip install pyserial” to install
it. If this doesn’t work then your environment variables aren’t correct or you need to open up a new Command Prompt window to use
the new variables.
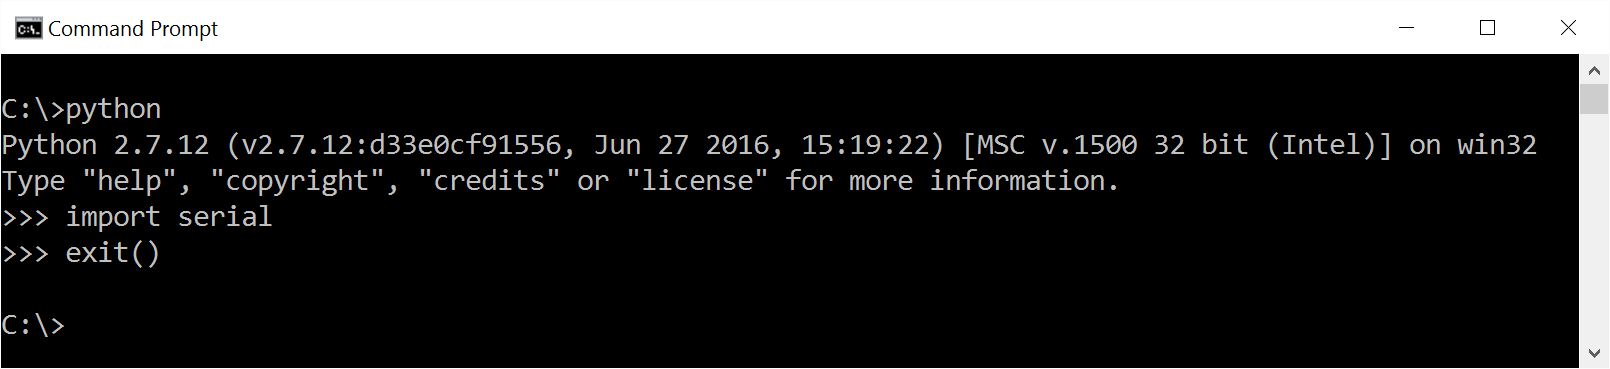
To test the install, run “python” from a Command Prompt window and then try “import serial”. If this work with no errors, then you
should be good with the Python and pyserial install.
Installing Python 2.7 and pyserial on Ubuntu Linux
For Ubuntu (or other Linuxes that use apt), log in and issue the commands:
sudo apt-get updatesudo apt-get install python2.7sudo apt-get install python-pippython -m pip install pyserial
Running the example code
On a machine that has a functional TrueRNG install, Python 2.7, and Pyserial, you just need to download the python code (read_truerng_example.py) and run it from the directory where you put it with:
python read_truerng_example.pyThis is what the output looks like when capturing with a TrueRNGpro. There is a 1,024,000 byte “random.bin” file in the current directory that conatains the captured data
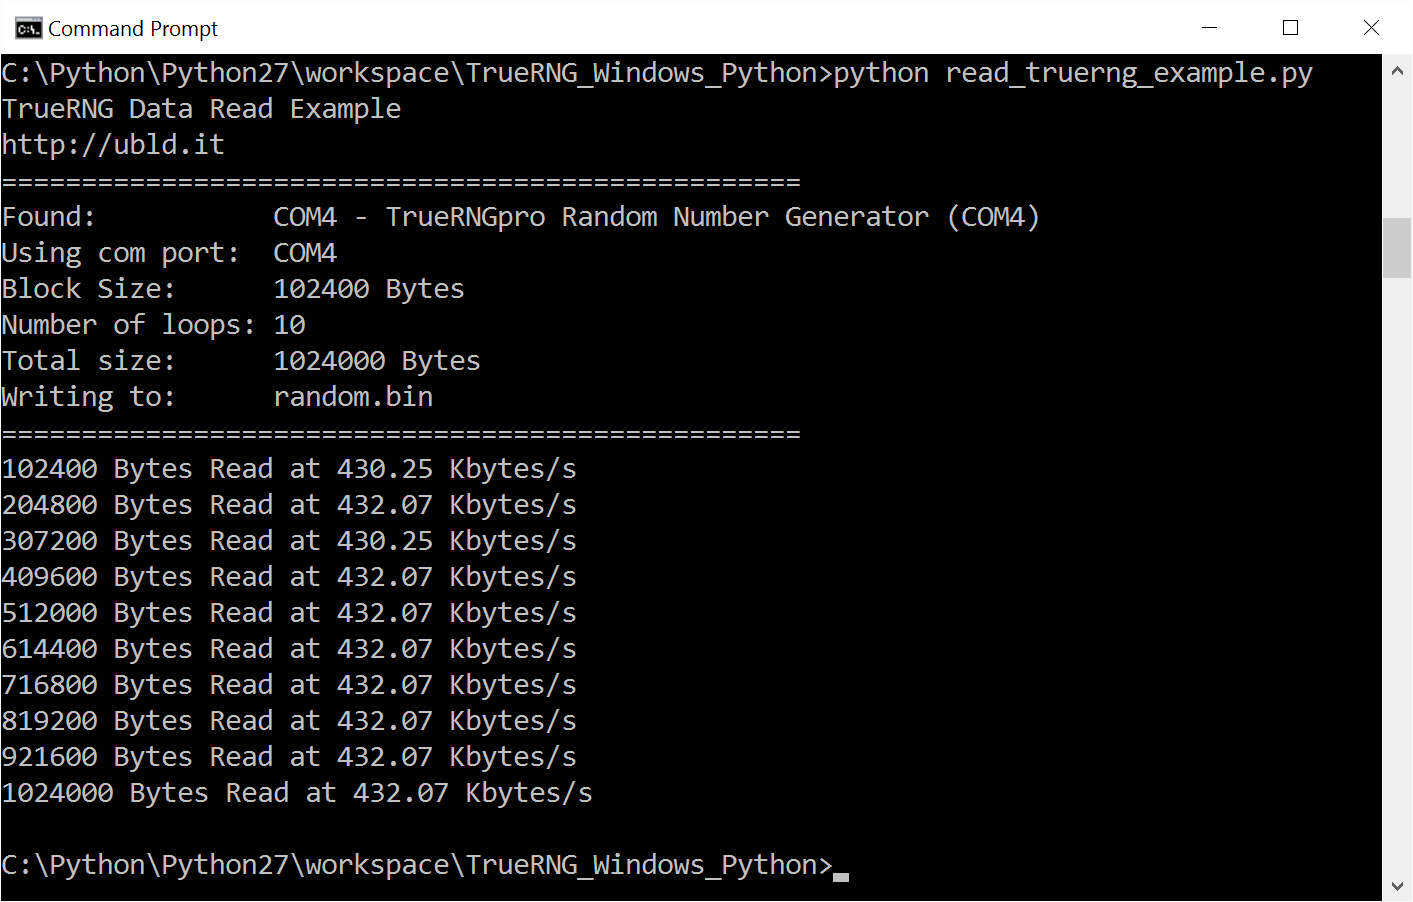
You can change blocksize or numloops to capture different amounts of data or modify the code for your own purposes
Here’s the Python code listed below.
#!/usr/bin/python

# TrueRNG Read - Simple Example
# Chris K Cockrum
# 8/21/2016
#
# Requires Python 2.7, pyserial
# On Linux - may need to be root or set /dev/tty port permissions to 666
#
# Python 2.7.xx is available here: https://www.python.org/
# Install Pyserial package with: python -m pip install pyserial

import serial
import time
from serial.tools import list_ports

# Size of block for each loop
blocksize=102400

# Number of loops
numloops=10
debugloops = 5

# Print our header
print('TrueRNG Data Read Example')
print('http://ubld.it')
print('==================================================')

# Create ports variable as dictionary
ports=dict()

# Call list_ports to get com port info
ports_avaiable = list(list_ports.comports())

# Set default of None for com port
rng_com_port = None

# Loop on all available ports to find TrueRNG
for temp in ports_avaiable:
 if temp[1].startswith("TrueRNG"):
 print('Found: ' + str(temp))
 if rng_com_port == None: # always chooses the 1st TrueRNG found
 rng_com_port=str(temp[0])

# Print which port we're using
print('Using com port: ' + str(rng_com_port))

# Print block size and number of loops
print('Block Size: ' + str(blocksize) + ' Bytes')
print('Number of loops: ' + str(numloops))
print('Total size: ' + str(blocksize * numloops) + ' Bytes')
print('Writing to: random.bin')
print('==================================================\n')


# Open/create the file random.bin in the current directory with 'write binary'
fp=open('random.bin','wb')

# Print an error if we can't open the file
if fp==None:
 print('Error Opening File!')

# Try to setup and open the comport
try:
 ser = serial.Serial(port=rng_com_port,timeout=10) # timeout set at 10 seconds in case the read fails
except:
 print('Port Not Usable!')
 print('Do you have permissions set to read ' + rng_com_port + ' ?')

# Open the serial port if it isn't open
if(ser.isOpen() == False):
 ser.open()
print('================== Debug Mode ====================')

# Put the TrueRNGpro in Debug Mode

# Knock Sequence
ser.baudrate = 110
time.sleep(0.1)
ser.baudrate = 300
time.sleep(0.1)
ser.baudrate = 110
time.sleep(0.1)

# Set Mode
ser.baudrate = 2400 # debug mode
time.sleep(0.1)

# This clears the receive buffer so we don't print binary data
ser.flushInput()
ser.flushInput()
returnline = ser.readline()
ser.flushInput()

# This labels our columns for readability
print("RNG1 RNG2")
print("_____ _____\n")

# Loop
for _ in range(debugloops):
 try:
 returnline = ser.readline() # Read a Line from the TrueRNGpro
 print(returnline) # Print the result to the console
 except:
 print('Read Failed!!!')
 break

print('================== Normal Mode ====================\n')

# Return back to Normal Mode

# Knock Sequence
ser.baudrate = 110
time.sleep(0.1)
ser.baudrate = 300
time.sleep(0.1)
ser.baudrate = 110
time.sleep(0.1)

# Set Mode
ser.baudrate = 300 # normal mode
time.sleep(0.1)
ser.flushInput()


# Set Data Terminal Ready to start flow
ser.setDTR(True)

# This clears the receive buffer so we aren't using buffered data
ser.flushInput()

# Keep track of total bytes read
totalbytes=0

# Loop
for _ in range(numloops):

 # Try to read the port and record the time before and after
 try:
 before = time.time() # in microseconds
 x=ser.read(blocksize) # read bytes from serial port
 after = time.time() # in microseconds
 except:
 print('Read Failed!!!')
 break

 # Update total bytes read
 totalbytes +=len(x)

 # If we were able to open the file, write to disk
 if fp !=0:
 fp.write(x)

 # Calculate the rate
 rate=float(blocksize) / ((after-before)*1000.0)

 print(str(totalbytes) + ' Bytes Read at ' + '{:6.2f}'.format(rate) + ' Kbytes/s')

# Close the serial port
ser.close()

# If the file is open then close it
if fp != 0:
 fp.close()